Introduction :
React has gained immense popularity as a powerful JavaScript library for building user interfaces. On the other hand, Liferay is a robust open-source enterprise portal platform widely used for developing scalable and feature-rich web applications. In this blog post, we will explore the integration of React with Liferay and discuss how this combination can empower developers to create dynamic and interactive web experiences.
Here three steps are follow for using React with Liferay
- Benefits of Combining React with Liferay
- Create react module in liferay
- Implementation in liferay with Apollo client
Benefits of Combining React with Liferay
- Developers may take advantage of Liferay’s functionality, such as user authentication, content management, and workflow management, while utilizing React’s capability with the Liferay React Module.
- Developers can create apps using a suite of tools and components provided by the Liferay React Module.
- Modular and reusable component-based development with React.js.
- React.js components combined with Liferay portlets allow for flexible page creation.
- Ability to use the React.js development environment and libraries.
- Building Liferay portal functionality for single-page applications (SPAs). The virtual DOM and effective rendering of React.js have improved performance.
- React.js supports cross-platform compatibility for developing applications that work on various devices.
Implementation of React module in liferay steps are as follow :
- Open the terminal where you need to place the react module.
- Use npm to install yo
npm install -g yo
- Using npm, install the Liferay JS Generator.
npm install -g yo generator-liferay-js
- Generate a React based portlet bundle project for deploying your app to your Liferay DXP installation
yo liferay-js
- Select React Widget.

- Write project name.

- If you want localization support then write yes otherwise no.
- If you want configuration support then write yes otherwise no.
- You have to give the name to your react module in widget list.

- Give your liferay path.

- Give yes for generating sample code.
- After that , deploy your bundle.
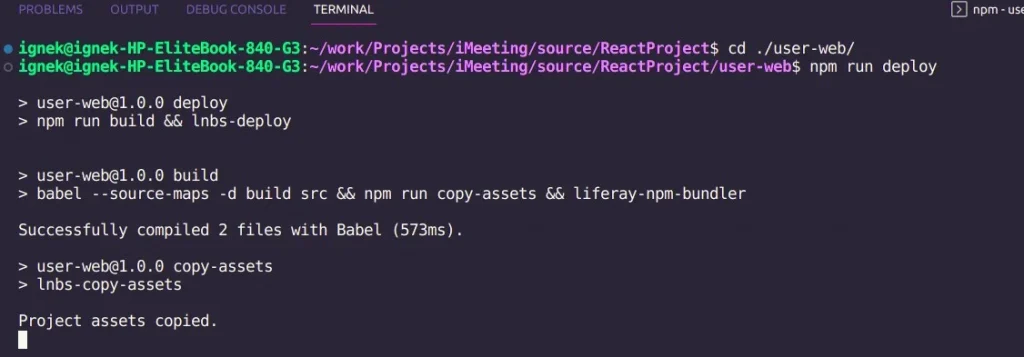
- Your React app is deployed and now available as a widget that you can add to site pages.
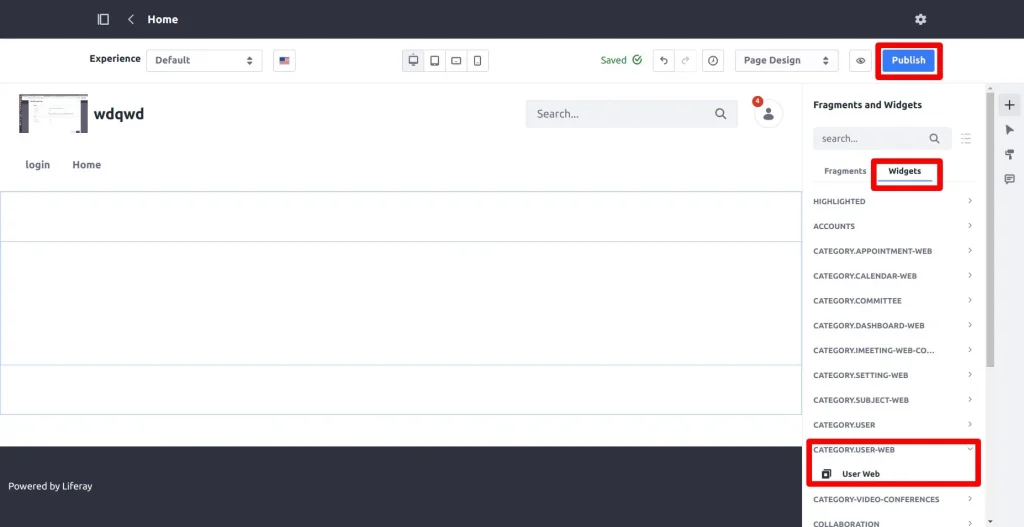
- First go to widgets tab -> User Web -> Drag and drop User Web -> Publish.
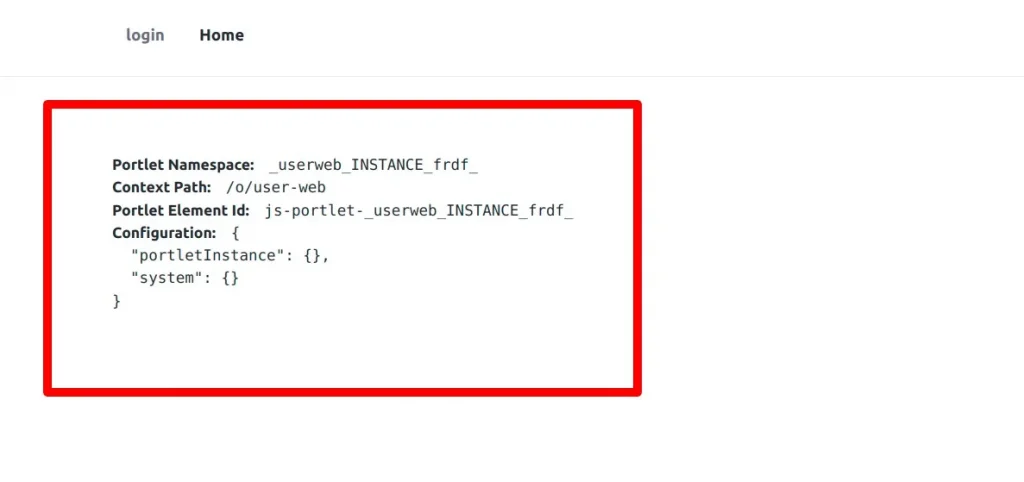
- React Application successfully render in Liferay.
Implementing Authorization in Liferay with Apollo Client
Introduction: Liferay is a robust portal platform known for its extensive authorization model, allowing fine-grained control over user access and permissions. Apollo Client, on the other hand, is a powerful GraphQL client for building data-driven applications. In this blog post, we will explore how to combine the authorization capabilities of Liferay with the flexibility of Apollo Client to implement secure and controlled data access in your React applications.- Set up Apollo Client:
- First, set up Apollo Client in your React application. Install the necessary dependencies:

- Then, create an instance of Apollo Client and configure it to connect to your Liferay GraphQL endpoint:
- Create client.js file in src folder and write down the following code which is given in the image.

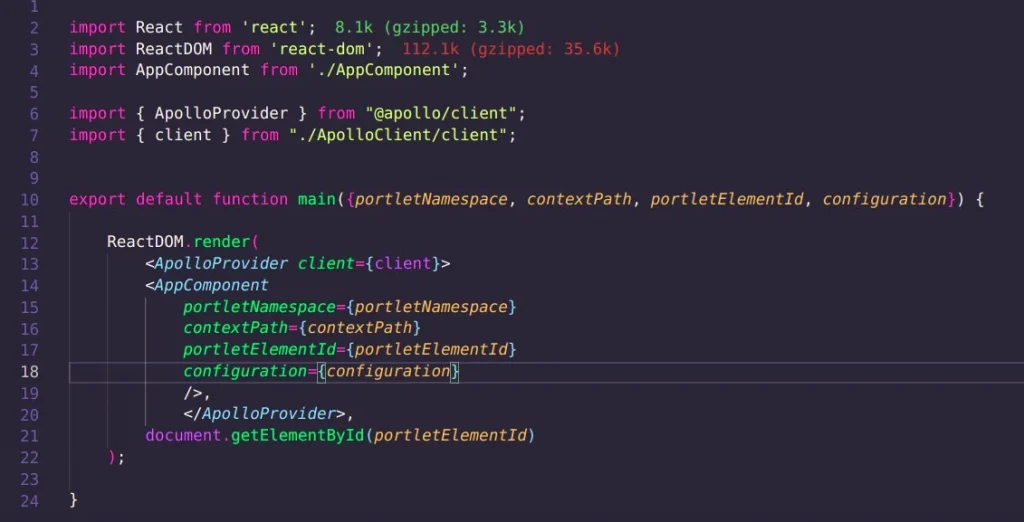
- Import client and ApolloProvider in index.js as given in the image.
- Put AppComponent in ApolloProvider as given in the image.
- Define GraphQL Queries/Mutations with Authorization:
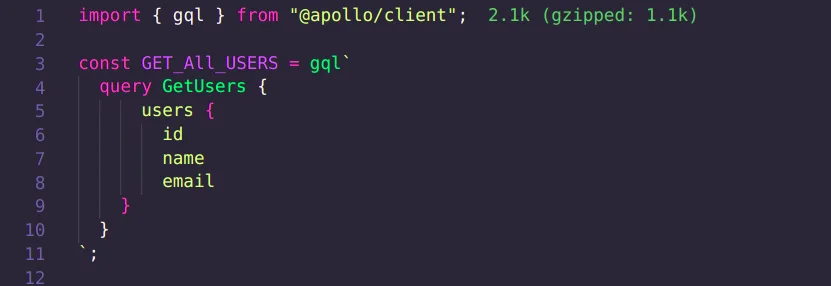
- Create queries.js file in src and put your query as shown in image.
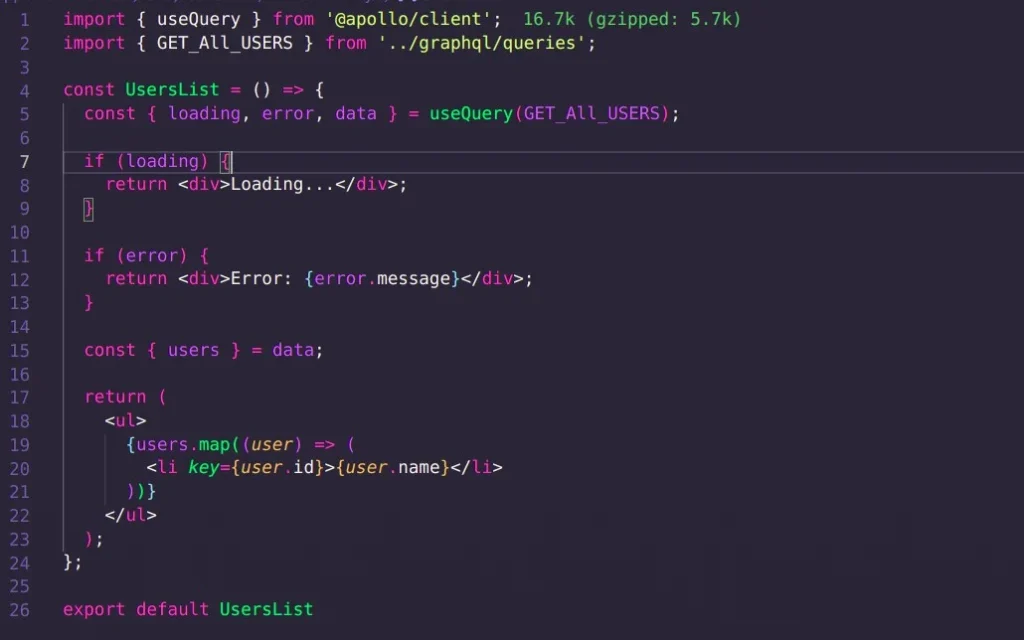
- Execute Queries/Mutations with Authorization: In your React components, you can now execute the queries/mutations using Apollo Client and handle the authorization response.
- In the example below, the useQuery hook is used to execute the GET_ALL_USERS query.
