Introduction:
A clear understanding of object relationships is a must during the development of the Liferay portal. These relationships define how different objects are connected within the Liferay portal. How to manage the relationships between Liferay objects is covered in this blog.Prerequisites:
- Liferay 7.4
- Start by creating two to three objects within Liferay and adding the necessary fields. Save the object.
- Take references from the blog below to create an object: https://ignek.com/blog/objects-in-liferay-7-4/
- Before working on that, understand the types of relationships. There are mainly two types of object relationships:
- One to Many
- This relationship works like one object entry from the parent object being connected to multiple object entries from the child object.
- In ‘One to Many’ relationships, the relationship is visible in the parent object’s relationship tab while the relationship field is created in the child object’s field tab.
- Many to Many
- This relationship works like multiple object entries from the parent object are connected to the multiple object entries from the child object.
- Understand this scenario, multiple students are enrolled in multiple courses, and vice versa, multiple courses are selected by multiple students.
- One to Many
- This relationship helps to relate one object entry from an object to multiple object entries from another object.
- Access the control panel and navigate to OBJECT > Objects.
- Select an object.
- Click on the “+” icon on the relationships tab to create a new relationship.

- The label will represent the relationship in the Liferay UI.
- The name will determine the relationship in the backend. The value of this field will not change after publishing the object.
- Select One to Many relationships to connect one object entry from the parent object to many object entries from the child object.
- By default, the current object is selected in the ‘One Recored of’ field.
- Select the child object in the ‘Many records of’ field.
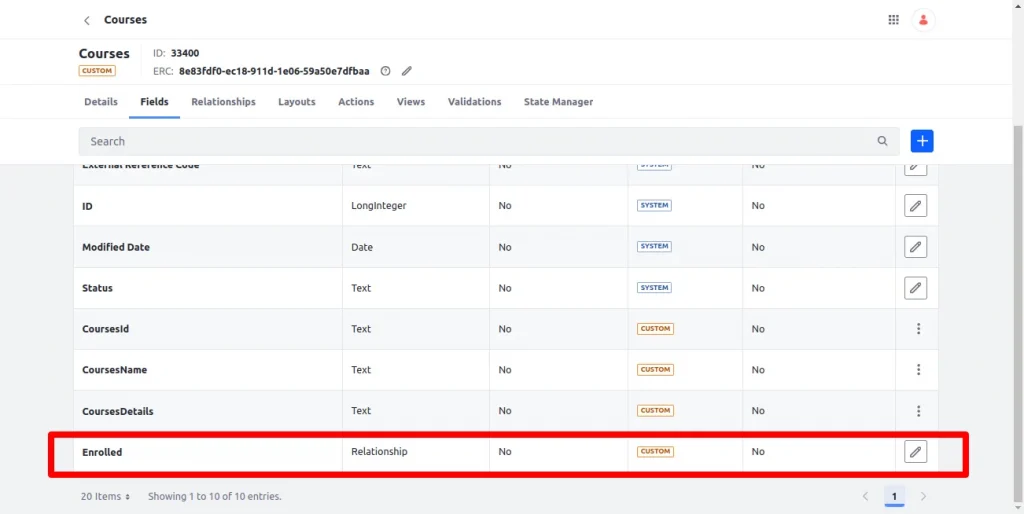
- Click save, and a field of relationships will be created in the child object.
Step 4: Many to Many Relationships
- This relationship helps to connect multiple object entries from an object to many object entries from another object.
- Access the control panel and navigate to OBJECT > Objects.
- Select an object.
- Click on the “+” icon on the relationships tab to create a new relationship.
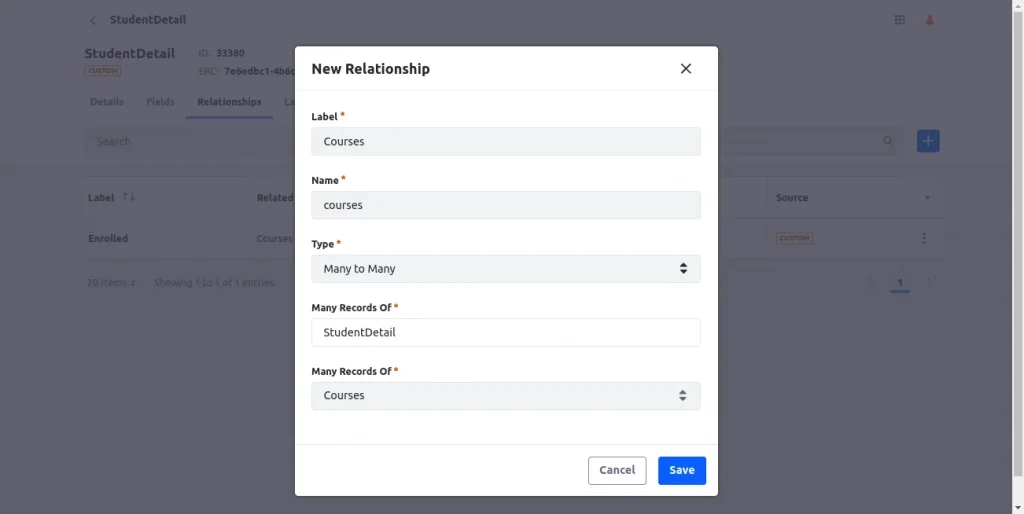
- The label field will represent the relationships in Liferay’s UI.
- The name field will determine the relationship in the backend. The value of this field will not change after the object is published.
- Select the “Many to Many” type to connect multiple object entries from the parent object to many object entries from the child object.
- By default, the current object is selected in the ‘Many recorded of’ field while creating a new relationship of many to many types. Which is considered a parent object.
- Select the child object in the other ‘Many Records of’ field.
- Fields in ‘Many to Many’ relationships are visible in the object layout.
- Navigate to the layouts page and click the ‘Add Object Layout’ button. A pop-up box will appear next. Give a name to the layout and hit the save button.
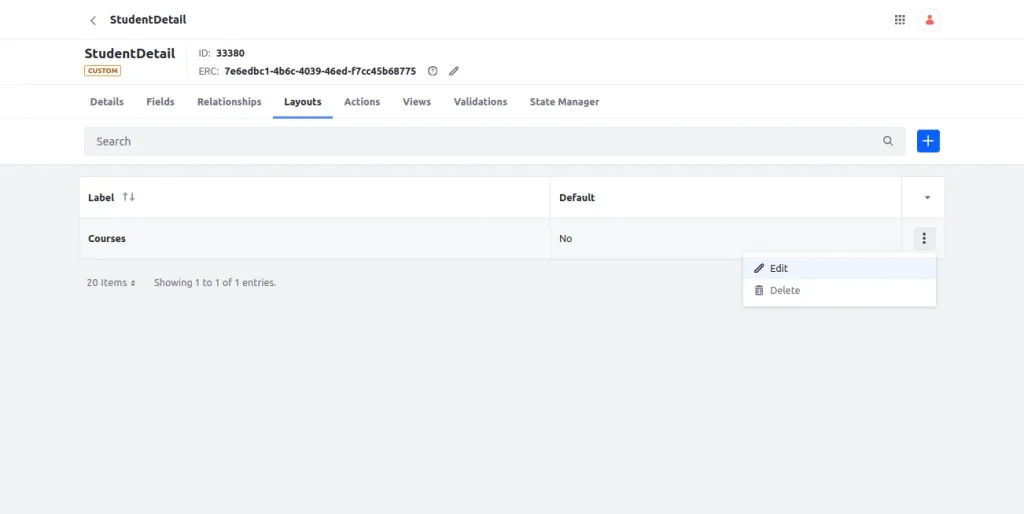
- Select the layout tab, click on the “Add tab” button, type the tab’s name, and then click on the “Save” button. Add the block the same way and add some fields.
- To create a relationship tab and add value to the relationship’s fields, once again use the “Add tab” button.
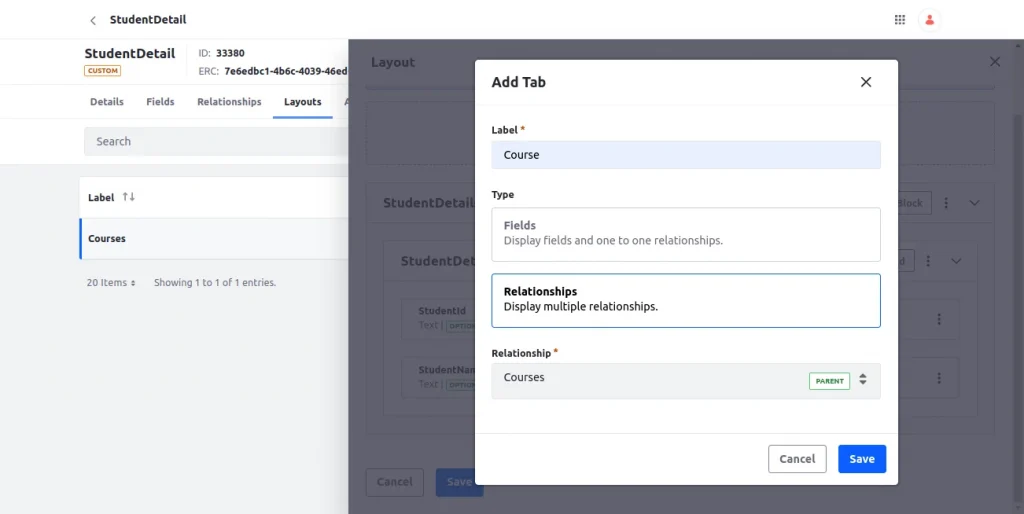
- Label: Add the label according to the requirements.
- Type: Select type as relationships.
- Relationship: Select the many-to-many relationship that was created previously in this step and save it.
- Mark layout as default and save the object.
- Now navigate to the object’s layout by following the panel link to the object’s details.
- The relationship tab will be visible, like in the image, once the page has been refreshed and the values have been added to the object.
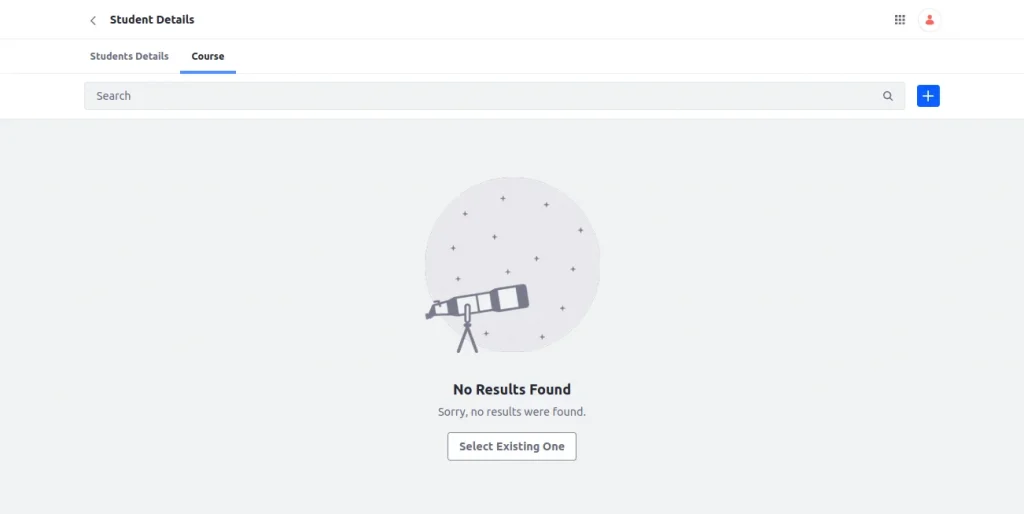
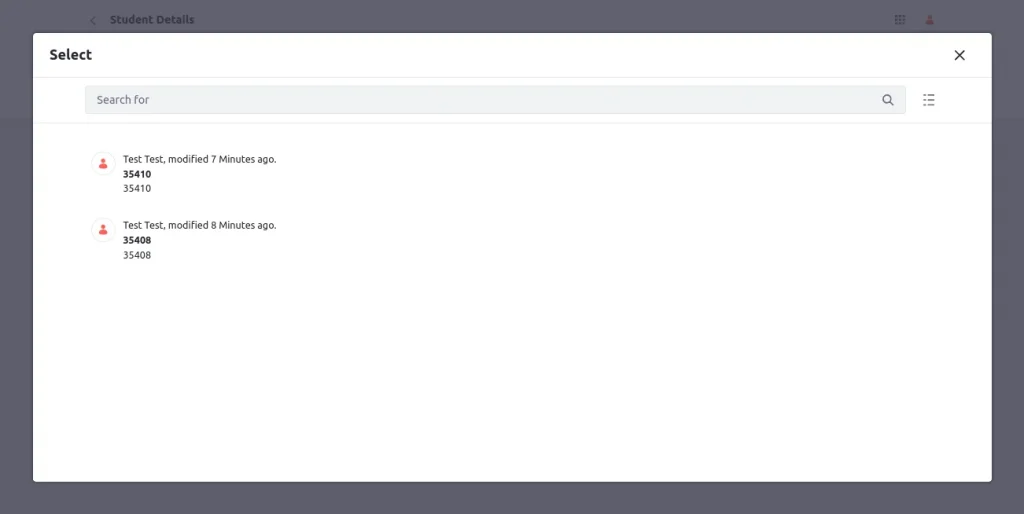
- Now, select items from the child object by clicking the “add” button.
Step 5: Deletion type
- There are mainly three types of conditions under which Liferay allows the deletion of relationship entries.
- Prevent: This will prevent the deletion of entries if any related child entries are there.
- Disassociate: This will allow the user to delete the parent entry without affecting the child entry. It will just remove the association between entries.
- Cascade: This will enable the user to remove the parent entry, but Liferay will also remove the child entry.
