Problem :
Enhancing Liferay Mail Configuration with Gmail App Password for Increased Security
Solution :
Google deprecated basic authentication for their email services.They are suggesting its customer move to OAuth 2.0 token-based authorization. We can use this OAuth 2.0 token-based authorization as password for gmail account. We can modify the Liferay server administration mail properties using Liferay OOTB.
Environment Requirements :
- Liferay
- Liferay dxp 7.x
Here this blog explains how to configure the mail server in liferay 7.x for sending and receiving emails using a Gmail account app password.
- Generate the gmail account app password
- Configuring Mail in Liferay
1) Generate the gmail account app password
Nowadays, Google deprecated basic authentication for sending and receiving their email services. So We have to generate App passwords for security purposes.
Follow the below steps to create app password for mail server configuration:
- Log in to your gmail account :-Open your web browser and navigate to Gmail (https://mail.google.com/)
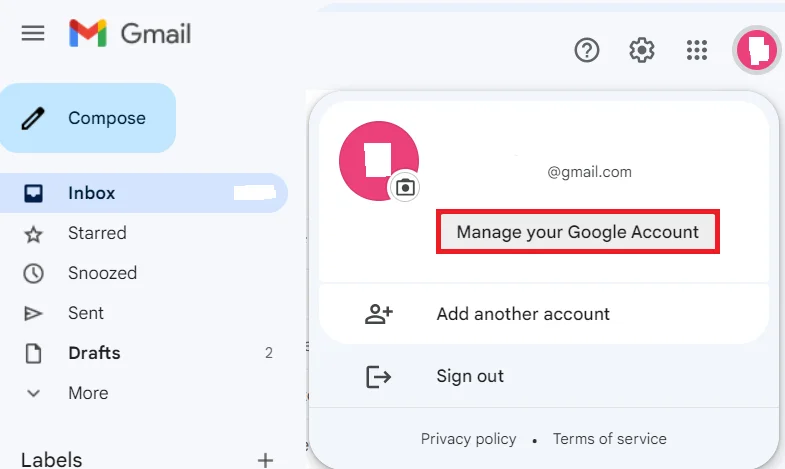
- Click on your profile picture in the top right corner of your Gmail interface. Click on manage your google account. This will redirect you to your google account settings.
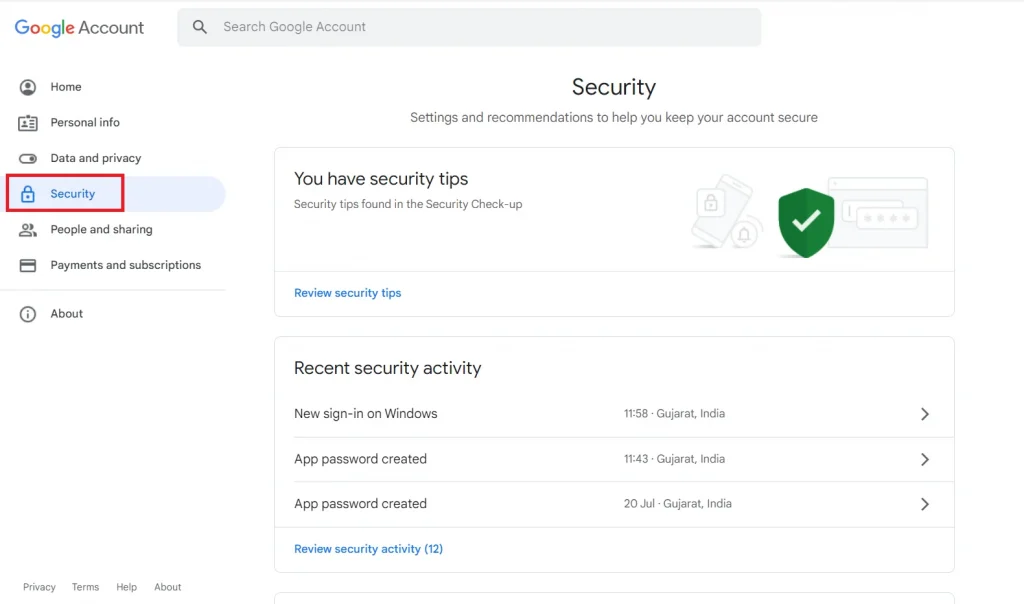
- In the Google Account Settings, click on the security tab on the left side of the panel.
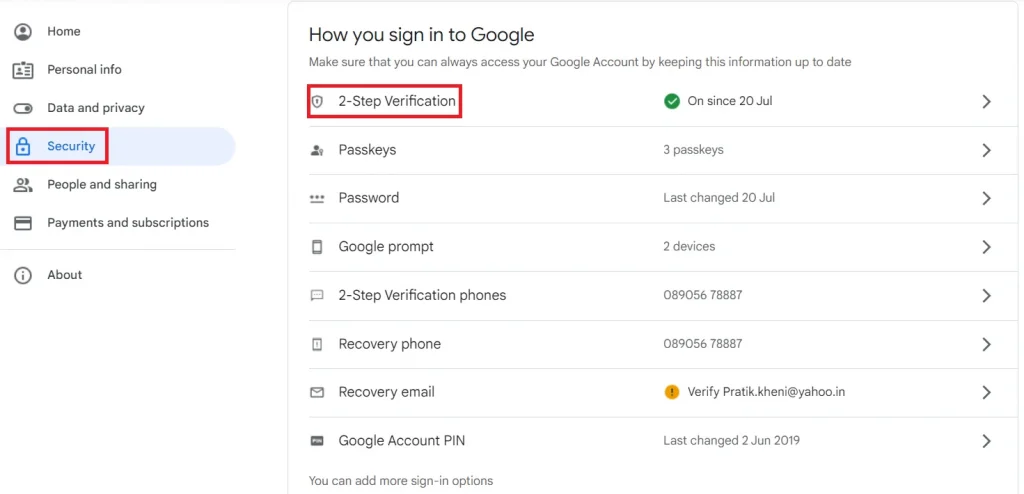
- Scroll down to the “How to sign in your google account” section. You will see the 2-step verification option.
Note: For creating App password, you must enable 2-step verification for your gmail account otherwise you will not be able to create app password.
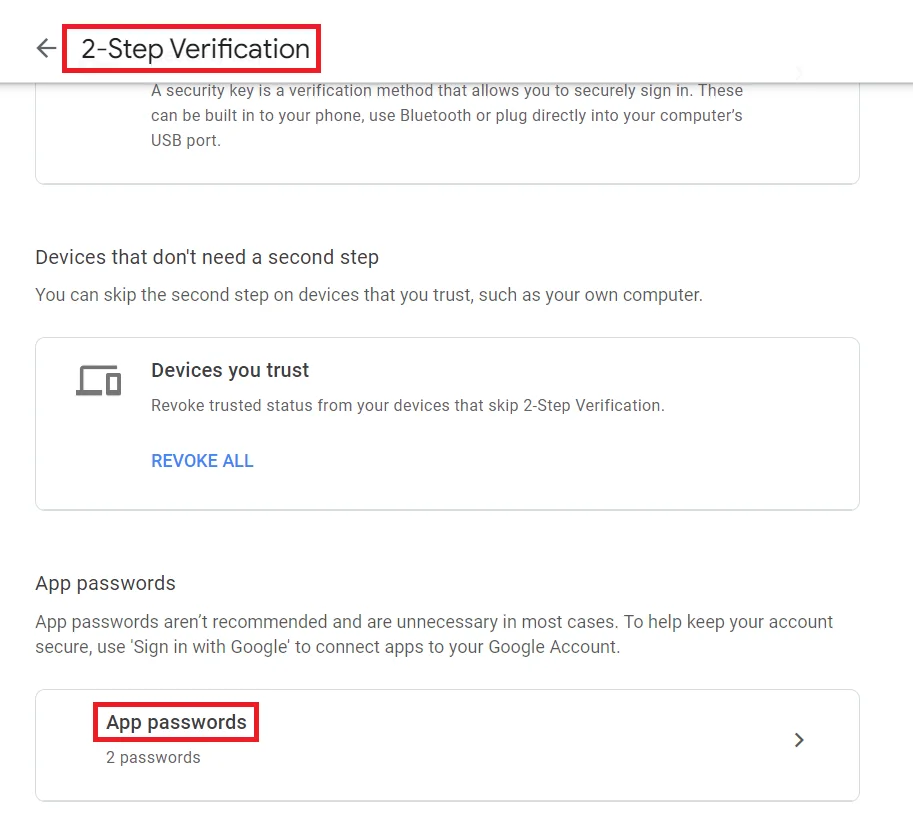
- Click On 2-step verification option. Scroll down to the 2-step verification section, at the bottom you will see the “App passwords” section.
- Click on App passwords. Open one new window seen as per below image.
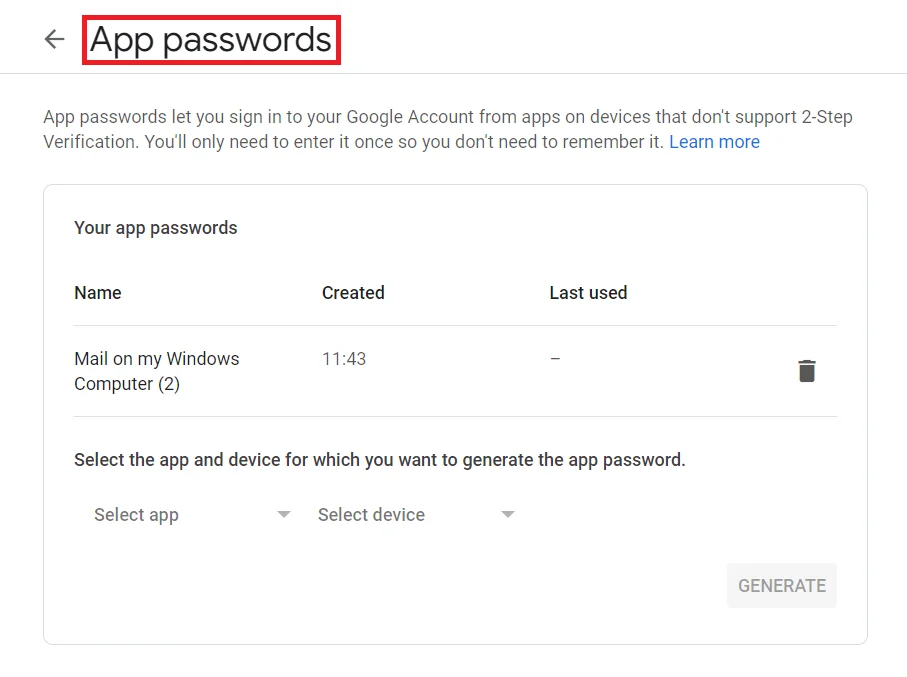
- For generating app password, select the app and devices for which you want to generate the app password.
- Here we select the app as Mail and the device as Windows Computer.
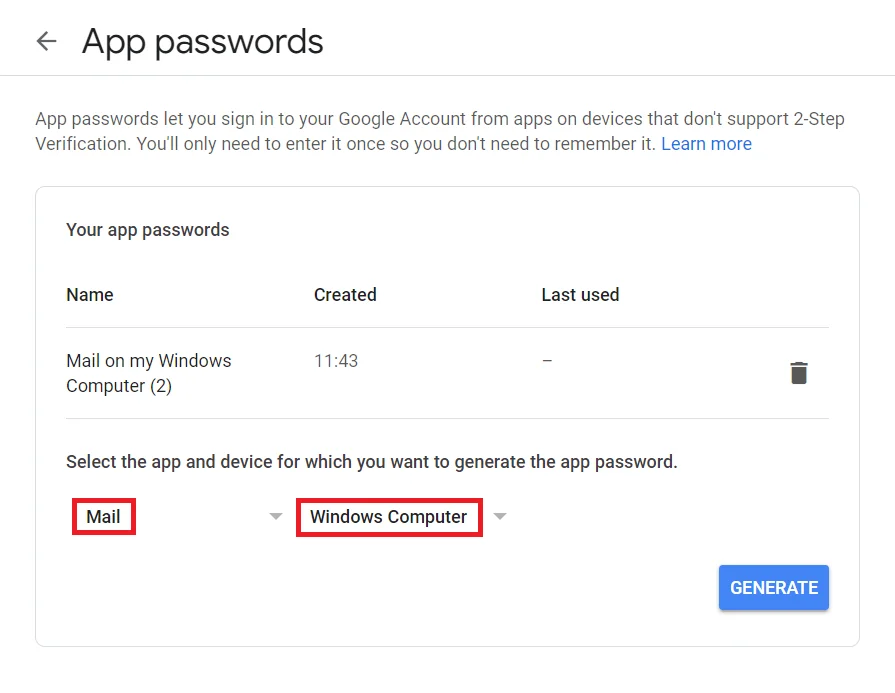
- Then click on GENERATE. Your app password is generated
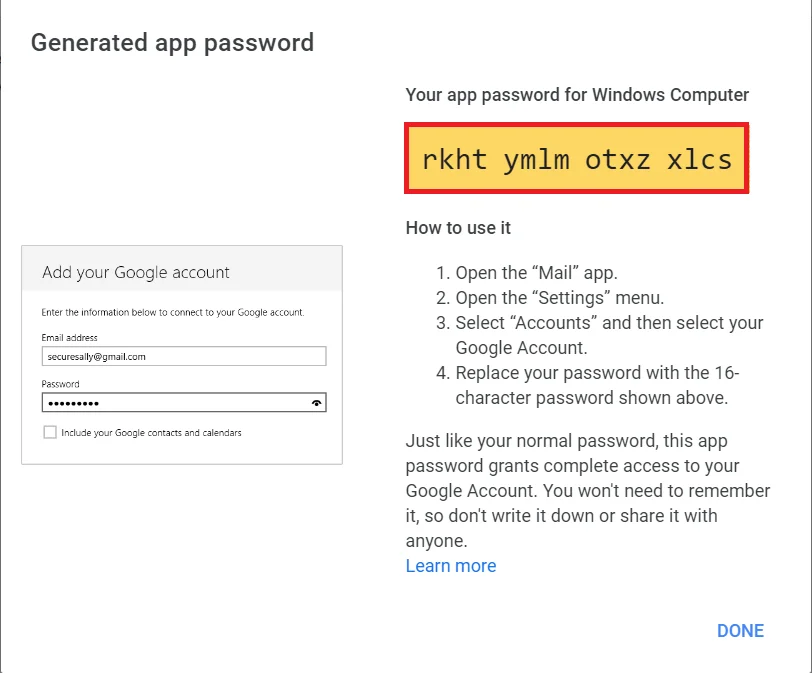
- Now replace your gmail account password with the 16-character password shown above image.
2) Configuring Mail in Liferay
Follow the below steps to configure mail session from control panel:
- Sign in as the Administrator user.
- Go to the Global menu(◧) → Control Panel → System → Server Administration → Mail
- Fill out the below configuration form.
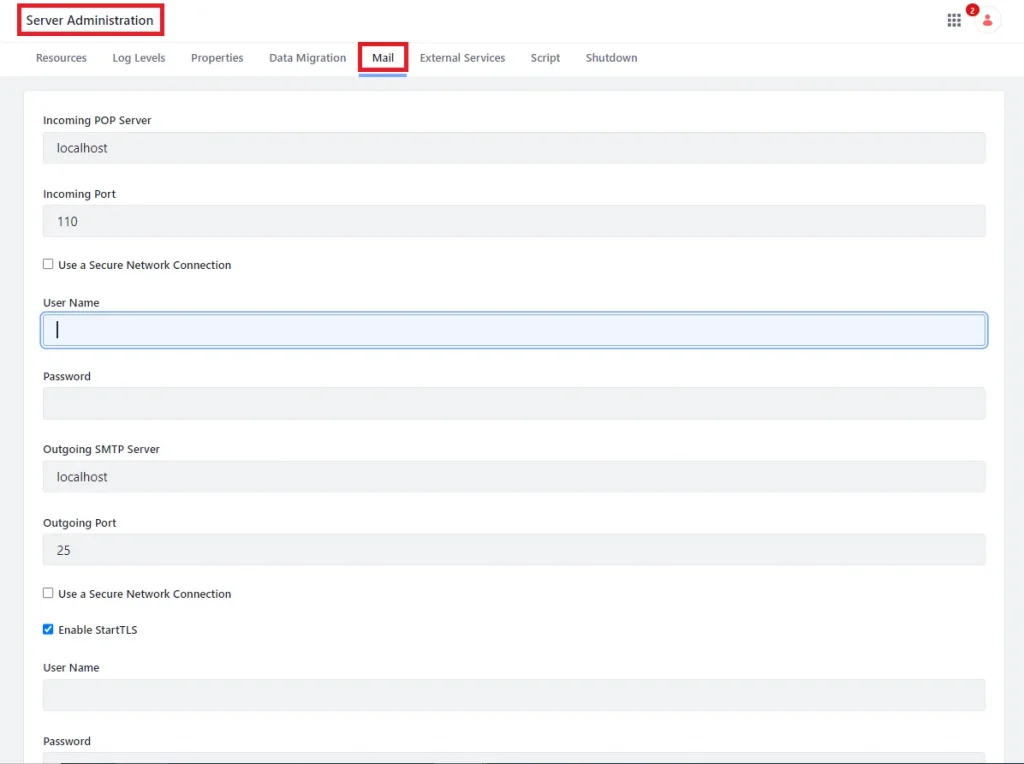
- In the above form, you are asked for following information:
- Incoming POP Server:- Refers to the server that handles incoming messages using the POP protocol.
- Incoming Port:- The port on which the POP server is listening.The default port for POP3 is 110, but some servers may use different ports for security reasons.
- Use a secure network connection:- The checkbox to enable whether to use an encrypted connection when connecting to the POP server.
- Username:- The user id used to log into the pop server.
- Password:- The password used to log into the pop server.
- Outgoing SMTP server:- Refers to the server that handles outgoing messages using the SMTP protocol.
- Outgoing Port:- The port on which the SMTP server is listening.The default port for SMTP is 25, but some servers may use different ports such as 587 or 465 , for secure connection.
- Use a secure network connection:- The checkbox to enable whether to use an encrypted connection when connecting to the SMTP server.
- Username:- The user id used to log into the SMTP server.
- Password:- The password used to log into the SMTP server.
- Manually specify additional JavaMail properties to override the above configuration: If there are additional properties you need to specify, supply them here.
| Incoming POP Server | pop.gmail.com |
| Incoming Port | 995 |
| Use a secure network connection | true |
| Username | Enter your gmail account |
| Password | Enter your gmail app password |
| Outgoing SMTP server | smtp.gmail.com |
| Outgoing Port | 465 |
| Use a secure network connection | true |
| Enable StartTLS | true |
| Username | Enter your gmail account |
| Password | Enter your gmail app password |
| Manually specify additional JavaMail properties to override the above configuration | If required |
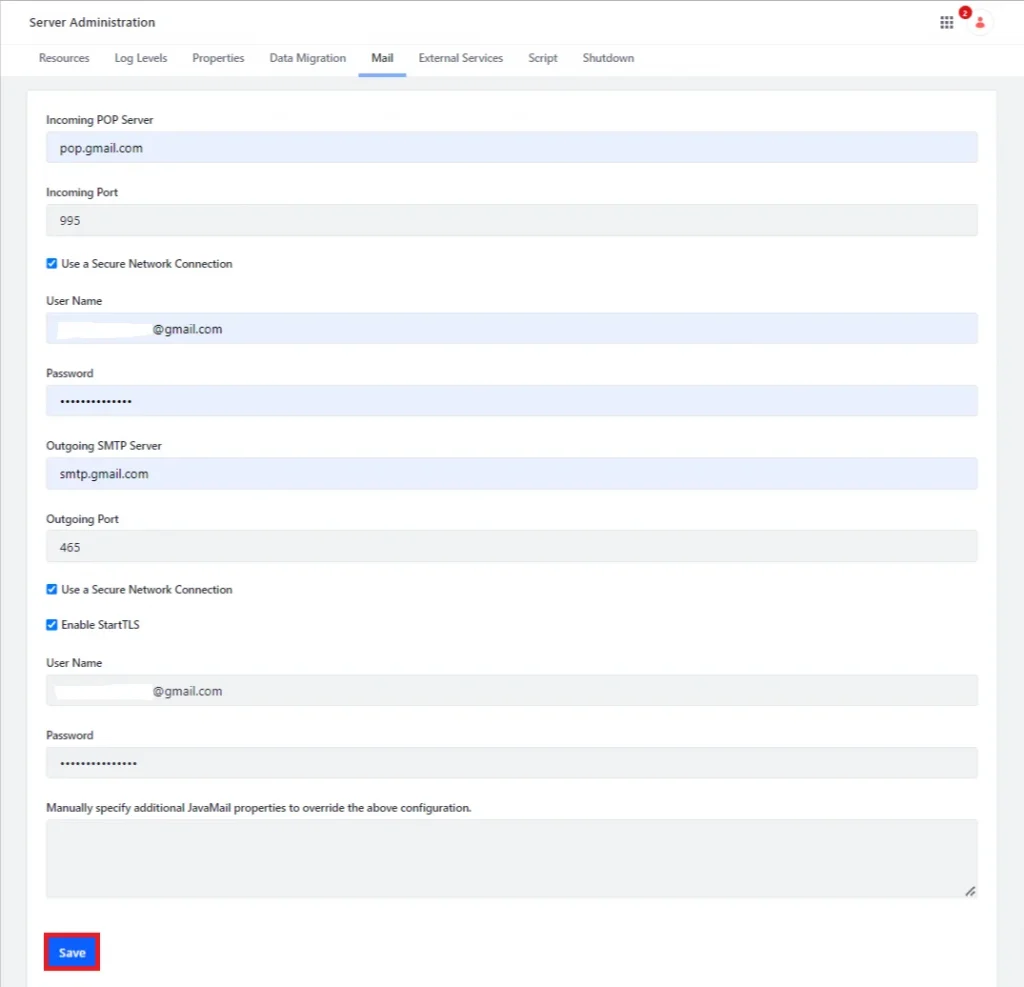
- Save the configuration. Now you should be able to send and receive emails from your portal.
Note: Make sure that you enable the Less Secure App Access in your gmail account.

